• Hello guest! Are you a Tegu enthusiast? If so, we invite you to join our community! Our site is specifically designed for you and it's a great place for Tegu enthusiasts to meet online. Once you join you'll be able to post messages, upload pictures of your Tegu and enclosure and have a great time with other Tegu fans. Sign up today! If you have any questions, problems, or other concerns email [email protected]!

Enclosure Tips?

hanniebann

Member
5 Year Member
Messages
196
Location
Arcata, CA
Hey there, not sure how many enclosure threads there've been, but I'm in need of visual aids! I've got my enclosure set for a young tegu, maybe for the year of his life, I need to start making plans for the enclosure I'm going to build him. If you have any pointers, tips, random outbursts- ANYTHING is greatly appreciated! **Especially pics of what you're keeping your gu friend in at home**
thanks!!
 

james.w

Active Member
1,000+ Post Club
5 Year Member
Messages
4,337
There are some pics of mine in the Tegus housing section. Post title is tegu/rhino enclosure.
 

hanniebann

Member
5 Year Member
Messages
196
Location
Arcata, CA
it looks wonderful! Is it going to be up on top of a table or on the ground? If it;s on the ground, does it become a pain to change heavy water dishes?
 

james.w

Active Member
1,000+ Post Club
5 Year Member
Messages
4,337
I haven't started using it yet, so I'm not sure on the water bowl issue. When I first move it in it will be set up on cinder blocks so my dogs kennels can slide underneath it. Eventually I am planning on it sitting on the floor with either one or two enclosures stacked on top. I'm hoping the 28" height isn't an issue, if you can go taller I would recommend at least 36".
 

Rhetoric

Moderator
Staff member
1,000+ Post Club
5 Year Member
Messages
2,210
I'm planning on doing something like this
http://www.redtailboa.net/forums/how-tos-tutorials/27834-8x4x4-tegu-cage-tutorial.html
this summer for my savy, depending how much larger my tegu gets he might need one too. Not sure if I'm going to keep the same sizes but I'm gonna replace the mesh with glass. There are tons of tutorial type things on this site and other forums, its fun to gather bits and pieces.
 

Max713

New Member
Messages
193
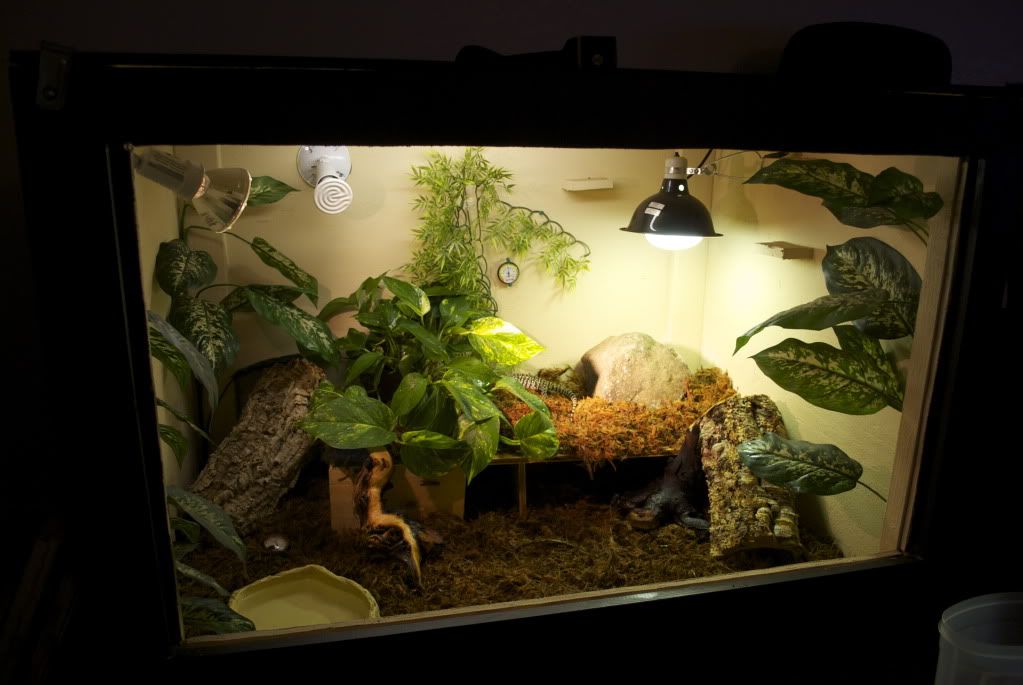
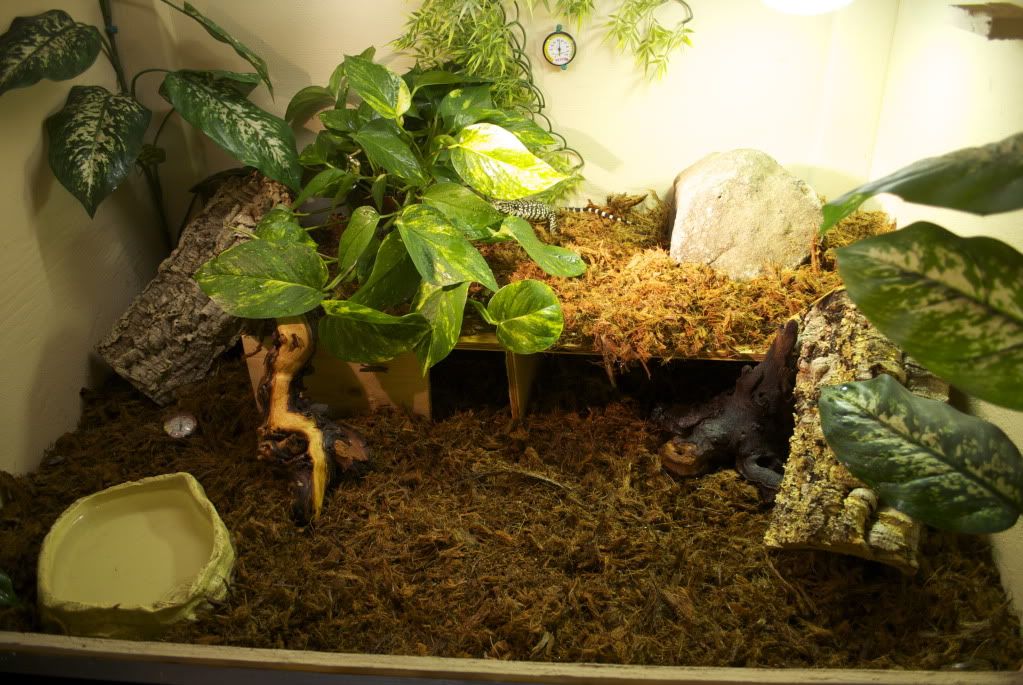
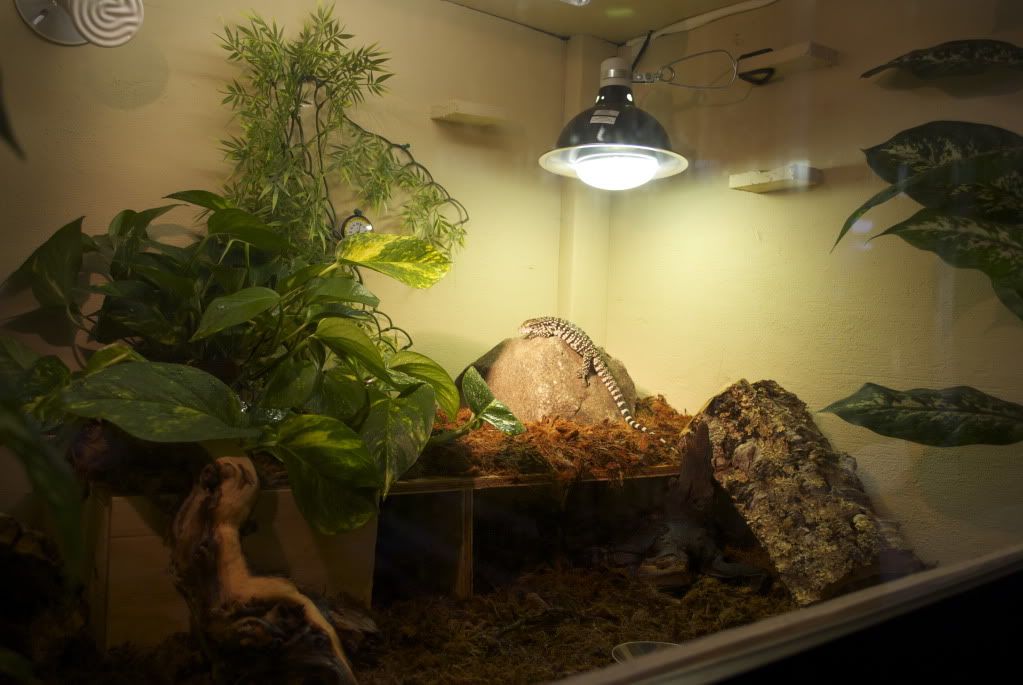
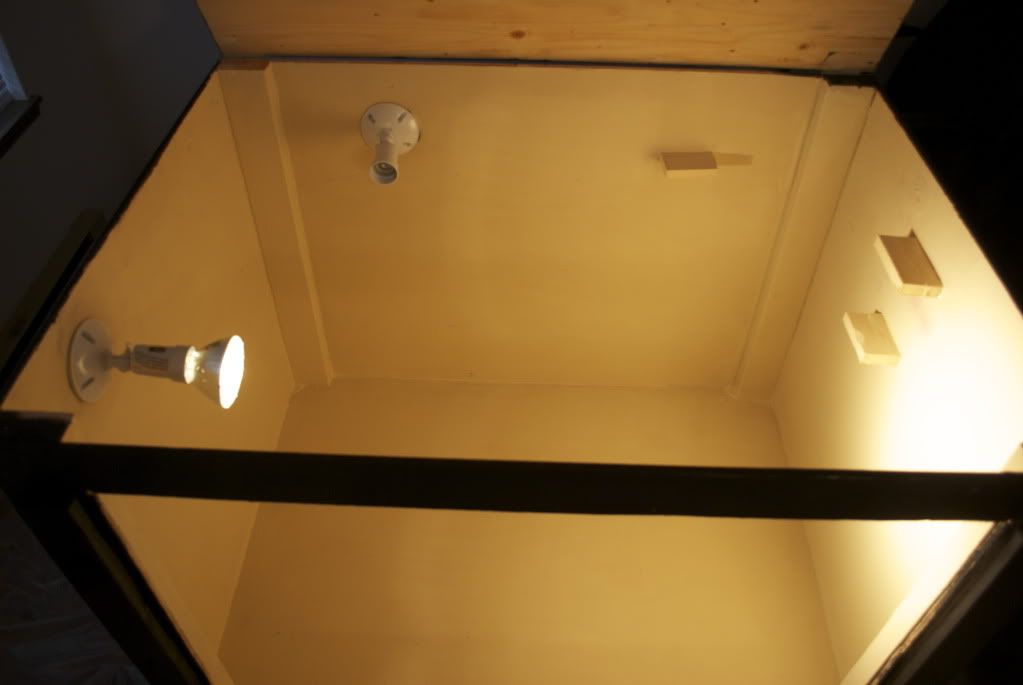
Here's Kimo's house. He will live here until he reached ~2.5' long, he'll then be treated to a 7'x3.5'
Only changes not pictured:
-Hide log at the far back left corner is now laid flat, with substrate mounded all the way around it, creating a small burrowing area with substrate depths between 8 and 10 inches
-Analog gauges have been replaced with a digital unit
DSC_0002-13.jpg

DSC_0003-13.jpg

DSC_0004-7.jpg

DSC_0002-7.jpg

DSC_0006-2.jpg


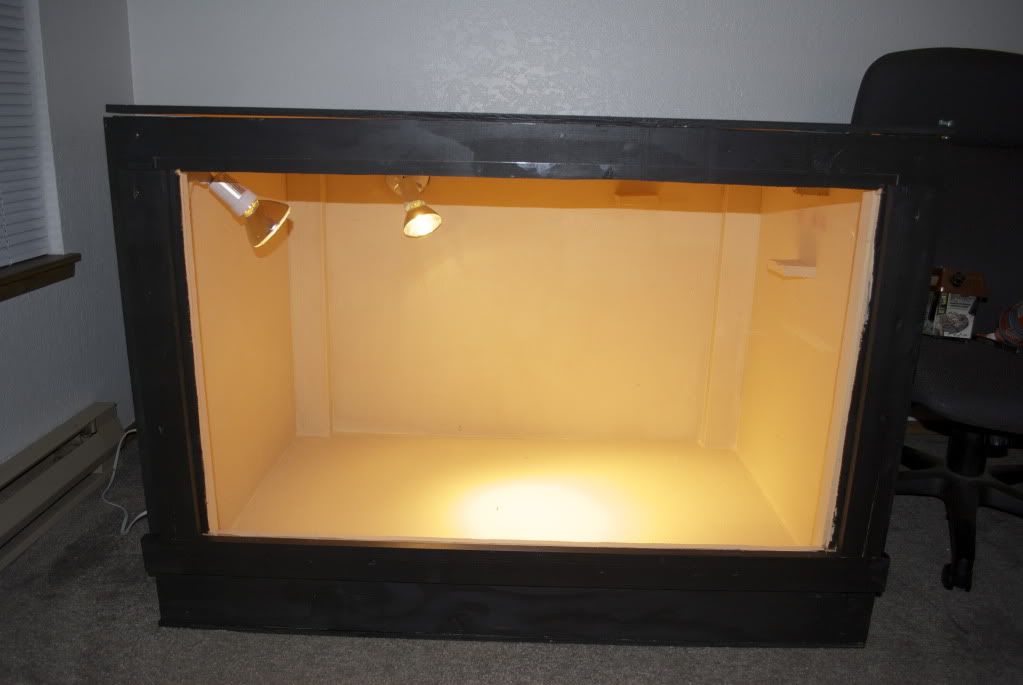
4'x3'x3'
-Plexiglass window
-Sealed with Drylok (latex based)
-Not air tight, but close to preserve humidity
-~85F Cold side, ~95F Hot
-Basking Area: 130F on top of the rock, 110F at substrate at base of rock

Lighting:
-Reptisun 160w UVB Basking bulb in ceramic clamp fixture
-75W Halogen Spot lamp in built in fixture, also aimed at basking spot
-75W Ceramic Heat element, only on at night

Other:
-Coarse Coco Husk Substrate (~3-4")
-Multiple Hides
-Raised basking area
-Live plant
-Decorations
-Digital hygro/thermo
-Small area of ~8" substrate (Would highly recommend, Kimo has a nice burrow dug there)
 

hanniebann

Member
5 Year Member
Messages
196
Location
Arcata, CA
nice setup! what did you use to seal the inside with?

lol I just saw you already posted the drylok on the pics. disregard my silly questions
 

Max713

New Member
Messages
193
hanniebann said:
nice setup! what did you use to seal the inside with?

lol I just saw you already posted the drylok on the pics. disregard my silly questions

Thank you!

Moondust said:
How much did it cost to build your cage, Max??

Wood: $136
Lighting/Fixtures: $149
Plants/Substrate/Decorations/Hides: $139
Everything else: $60

I can post all exact prices for every individual material used if you would like. Also take into consideration tool rental if you don't have your own. You will need: Cordless Drill, Jigsaw or Skillsaw, square, extension cord, pencil, brush, roller, paint tray, floor liner (If you paint it inside).
I bought all my wood from home depot. What's great about that is they will cut all your plywood to size, which is a pain to do at home. First 5 cuts are free, 50 cents for everyone after that. The only plywood I had to cut, was the hole for the front door, which I did with a Jigsaw on this particular cage, although I prefer a Skillsaw.
After a trip to home depot, I had the entire enclosure assembled in less than an hour, and a coat of paint inside and out within 2 hours.
It's really not that difficult, just take your time, and do it right!
 

Members online

No members online now.

Forum statistics

Threads
20,149
Messages
177,950
Members
10,404
Latest member
Saul6rosales
Top